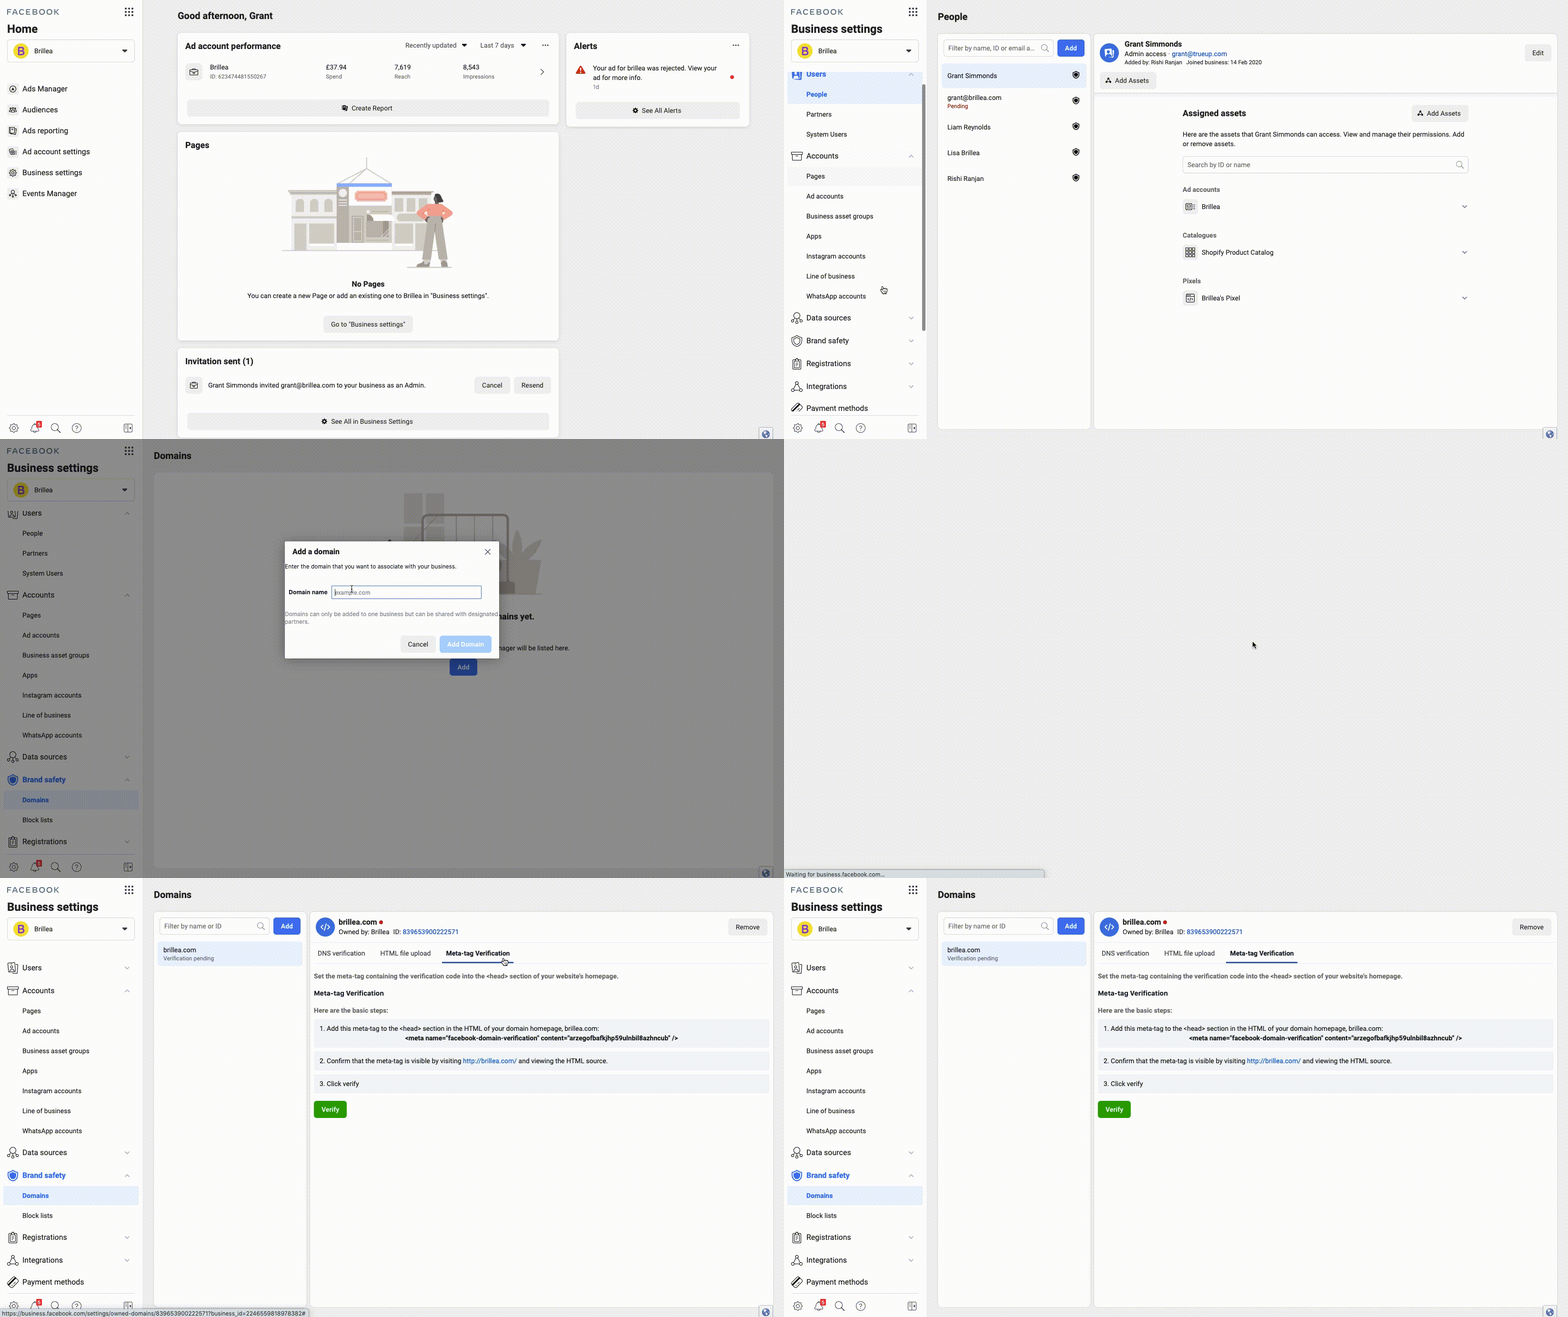
Each domain (website url/address) your facebook pixel is triggered on will now have to be verified within facebook. For example if you have a Ecommerce site with the following domains shop.brillea.com and brillea.com. If both of these domains feature the facebook pixel they will both need to be validated within facebook.
If you are using an Ecommerce CMS (Shopify, WooCommerce etc), you will only need to add the domain that your store is accesed on.

To verify, please follow these steps:
- Login to Facebook
- Access your business settings
- Under Brand Safety > select Domains
- Click Add Domain, and insert your domain name. ( make sure you do this for each of the pixel is installed on) You may have to refresh your page to see the domain you have added.
- Add the Verification Code to your site:
This section may require technical help to achieve, there are three ways that you can verify you are the domain owner:
DNS verification - Easiest to implement This requires access to your domain owner (e.g. goDaddy, names.com, 123reg) You will need to follow the steps and Add the TXT record provided.
If you purchased your domain name through shopify, you can do this within the platform follow these steps.
HTML file upload Upload an HTML verification file to your website. To do this, you need admin access to your website's root folder. This will verify your domain immediately.
Meta-tag Verification Set the meta-tag containing the verification code into the <head> section of your website's homepage.
Once you have completed one of the steps above click the Verify button this will notify you if it has been successful or if amends are required.
How to Add Meta-tag Verification on Shopify